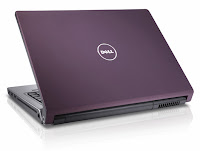
This HOWTO describes how to get Wifi working on your Dell Laptop using Ndiswrapper. This applies if you have the Broadcom "Dell Wireless 1390 WLAN MiniCard", which as far as I know, is the cheaper, low-end version that Dell currently offers in laptop. This HOWTO has been tested and works with both 32 bit and 64 bit ubuntu, and uses the exact same method for both. It is VERY IMPORTANT that you read every part of this how-to and follow the steps EXACTLY as they're written. Many users have trouble because they only read the code sections and ignore my directions to change to the proper directories. Again, PLEASE BE SURE YOU ARE IN THE PROPER DIRECTORY WHEN EXECUTING THESE COMMANDS. This will save you a lot of trouble and will make the installation go a lot smoother.
STEP 1: CLEAN YOUR SYSTEM
IMPORTANT NOTE ABOUT CLEANING YOUR SYSTEM:
One of the most common reasons why many people can't get their wireless working is because their system is in a state of chaos. If you have made ANY previous attempts to get your wireless working -- either using fwcutter, ndiswrapper, or the bcm43xx drivers -- this how-to will most likely not work UNTIL you reverse your previous changes. In many cases, it is much easier to simply reinstall ubuntu and come straight to this how-to. Alternatively, you can manually clean your system of the previous attempts, as outlined in various posts throughout this thread. But BE WARNED: If you have done ANY previous work on your wireless, there is almost no chance that this how-to will work unless you clean your system.
If you have a fresh install of Ubuntu, you need to remove any and all versions of Ndiswrapper that come installed by default on your system:
Code:
| sudo rmmod ndiswrapper sudo ndiswrapper -e bcmwl5 sudo apt-get remove ndiswrapper-utils |
STEP 2: GET NEEDED PACKAGES
We'll need to install compiling tools (don't panic when you read that, just bear with me), the latest kernel headers, and then the source code for the latest ndiswrapper (seriously, don't panic. This will be very simple), and the wireless drivers from Dell.com.
Here I am using R151517.EXE driver it is for Inspiron E1505. Replace the R151517 with your driver Number. You can find this number on your drivers of windows or on Dell website-> Drivers & Downloads-> select your Laptop model->Network->Dell driver( Wireless Driver).
Or copy your Dell Wireless Driver to your Harddisk from your Dell Driver CD and then no need to execute 4th step "wget" in the following code.
Code:
| sudo apt-get update sudo apt-get install build-essential sudo apt-get install linux-headers-`uname -r` wget http://ftp.us.dell.com/network/R151517.EXE |
NOTE: The characters around `uname -r` are BACK TICS, NOT apostrophes. A back tic is usually located at the top left of your keyboard, to the left of the 1 key. The command WILL NOT WORK if you use apostrophes. Just copy/paste the commands from this how-to in to your terminal to avoid making typos.
At this point, you need to go to the ndiswrapper sourceforge site and get the latest version of the Ndiswrapper program.
Code:
| wget http://sourceforge.net/projects/ndiswrapper/files/stable/1.55/ndiswrapper-1.55.tar.gz/download |
If that wget doesn't work, just go here: http://sourceforge.net/project/showfiles.php?group_id=93482
Uncompress the ndiswrapper source (in my example, the file name is ndiswrapper-1.55.tar.gz):
Code:
| tar -xzvf ndiswrapper-1.55.tar.gz |
Finally, we need to blacklist the broken and useless bcm43xx firmware drivers that try to load in a default ubuntu install:
Code:
| sudo echo blacklist bcm43xx >> /etc/modprobe.d/blacklist |
Code:
| sudo -s echo blacklist bcm43xx >> /etc/modprobe.d/blacklist exit |
YOU MUST REBOOT NOW!
STEP 3: COMPILE PROGRAM
Now we'll complile the Ndiswrapper program. In a terminal, go to the directory where you extracted ndiswrapper and execute the following:
Code:
| cd YOUR-NDISWRAPPER-DIRECTORY sudo make uninstall |
IMPORTANT: Do the above command multiple times. You can stop when you get the message that says something about no files or directories found. This usually means running the command 2 or 3 times, but not more than about a dozen.
Code:
| sudo make distclean sudo make sudo make install |
STEP 4: INSTALL DRIVERS
If that worked, then you now have Ndiswrapper installed. Now we need to install the drivers. In a terminal, go to the directory where you have the R151517.EXE file:
Code:
| unzip -a R151517.EXE |
Now change directories to the DRIVER directory that was just extracted.
Code:
| cd YOUR-DRIVER-DIRECTORY sudo ndiswrapper -i bcmwl5.inf sudo ndiswrapper -l |
you should see a message that says driver present, hardware detected.
code:
| sudo ndiswrapper -m sudo modprobe ndiswrapper sudo echo ndiswrapper >> /etc/modules |
NOTE: If the above echo command gives you a permission denied error, try this code instead:
| sudo -s echo ndiswrapper >> /etc/modules exit |
Some users have reported the need to reboot here.
STEP 5: TEST WIRELESS
Your wifi light on your laptop should be illuminated, and you're all set! Try running this to see if your wireless card is functioning properly:
Code:
| sudo iwlist scanning |
Tags:Dell,Dell Help,How TO:Dell Wireless (Broadcom 1390 WLAN),Linux,Ubuntu,How to Dell wireless in Ubuntu?,How to get wifi in Dell laptop of ubuntu linux.
© stuffadda.blogspot.com|stuffcenter.co.cc|stuffcentre.co.cc


 11/27/2009 07:25:00 AM
 Unknown


 Posted in:


2 comments:
Thanks
Now able to connect
Thank u!
Hav a nice day!
Post a Comment